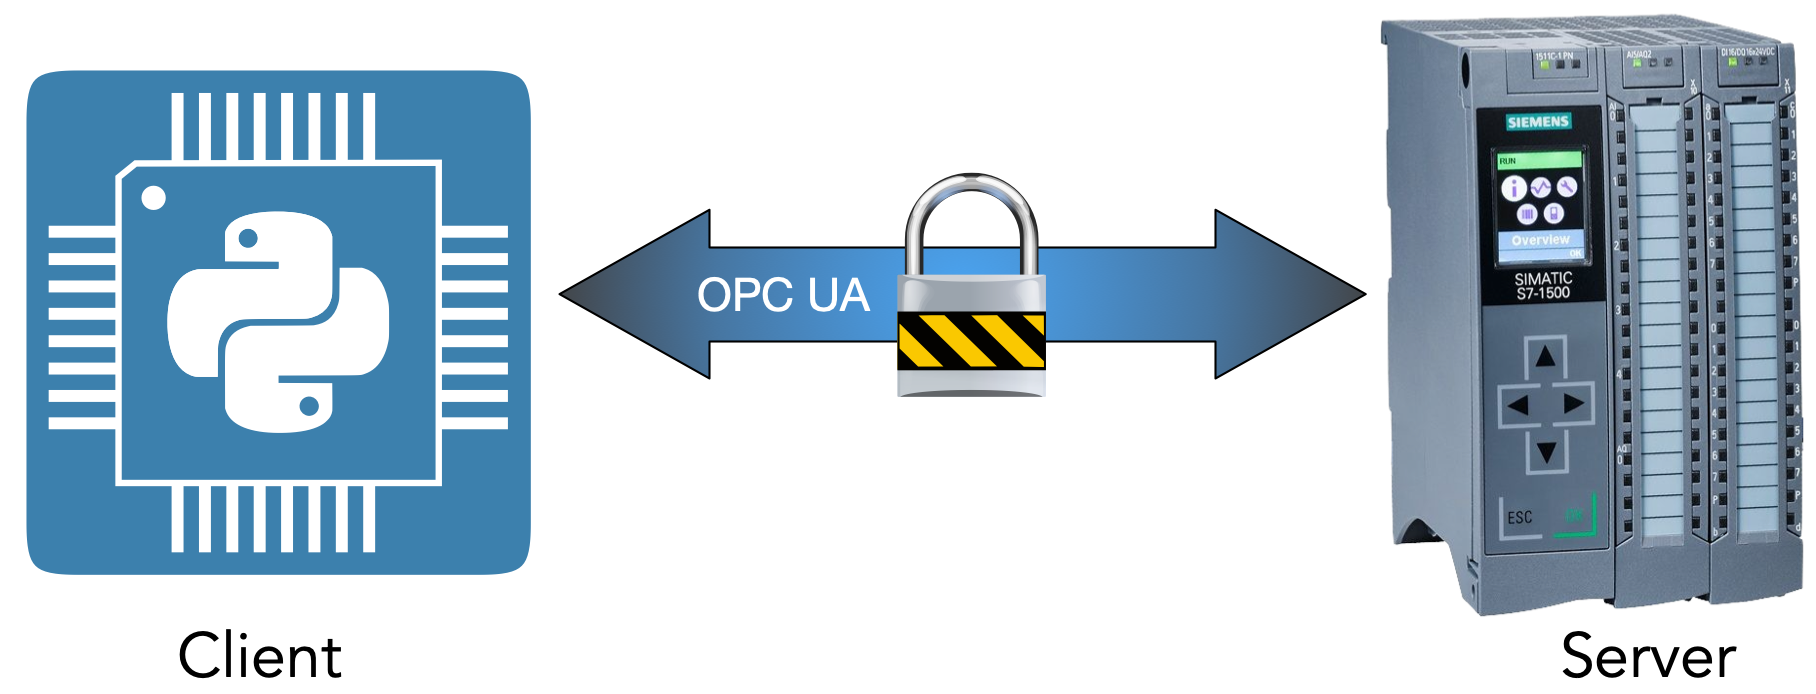
Since our original architecture stays the same (Python application is OPC UA client and S7-1500 is OPC UA Server), the following steps summarize the procedure to setup an encrypted and authenticated communication between our two peers:
- In TIA portal the use of global security settings need to be enabled
- Client and server certificates need to be generated to achieve mutual authentication
- In TIA portal the security level needs to be increased by enforcing encrypted/authenticated communication and rejecting plaintext messages
- Exporting the client certificates from TIA
- Converting the exported certificates using OpenSSL to be used in our python application
- Preparing our python application to use the certificates
Authentication and encryption will hereby be achieved using PKI infrastructure. You should have a basic knowledge how PKI (public key infrastructure) works because setting things up using the TIA portal is not straight forward and can lead to wrong results and procedures. Nevertheless, if you follow the steps I describe below, you will end up with a working system regardless of your knowledge in the domain of PKI.
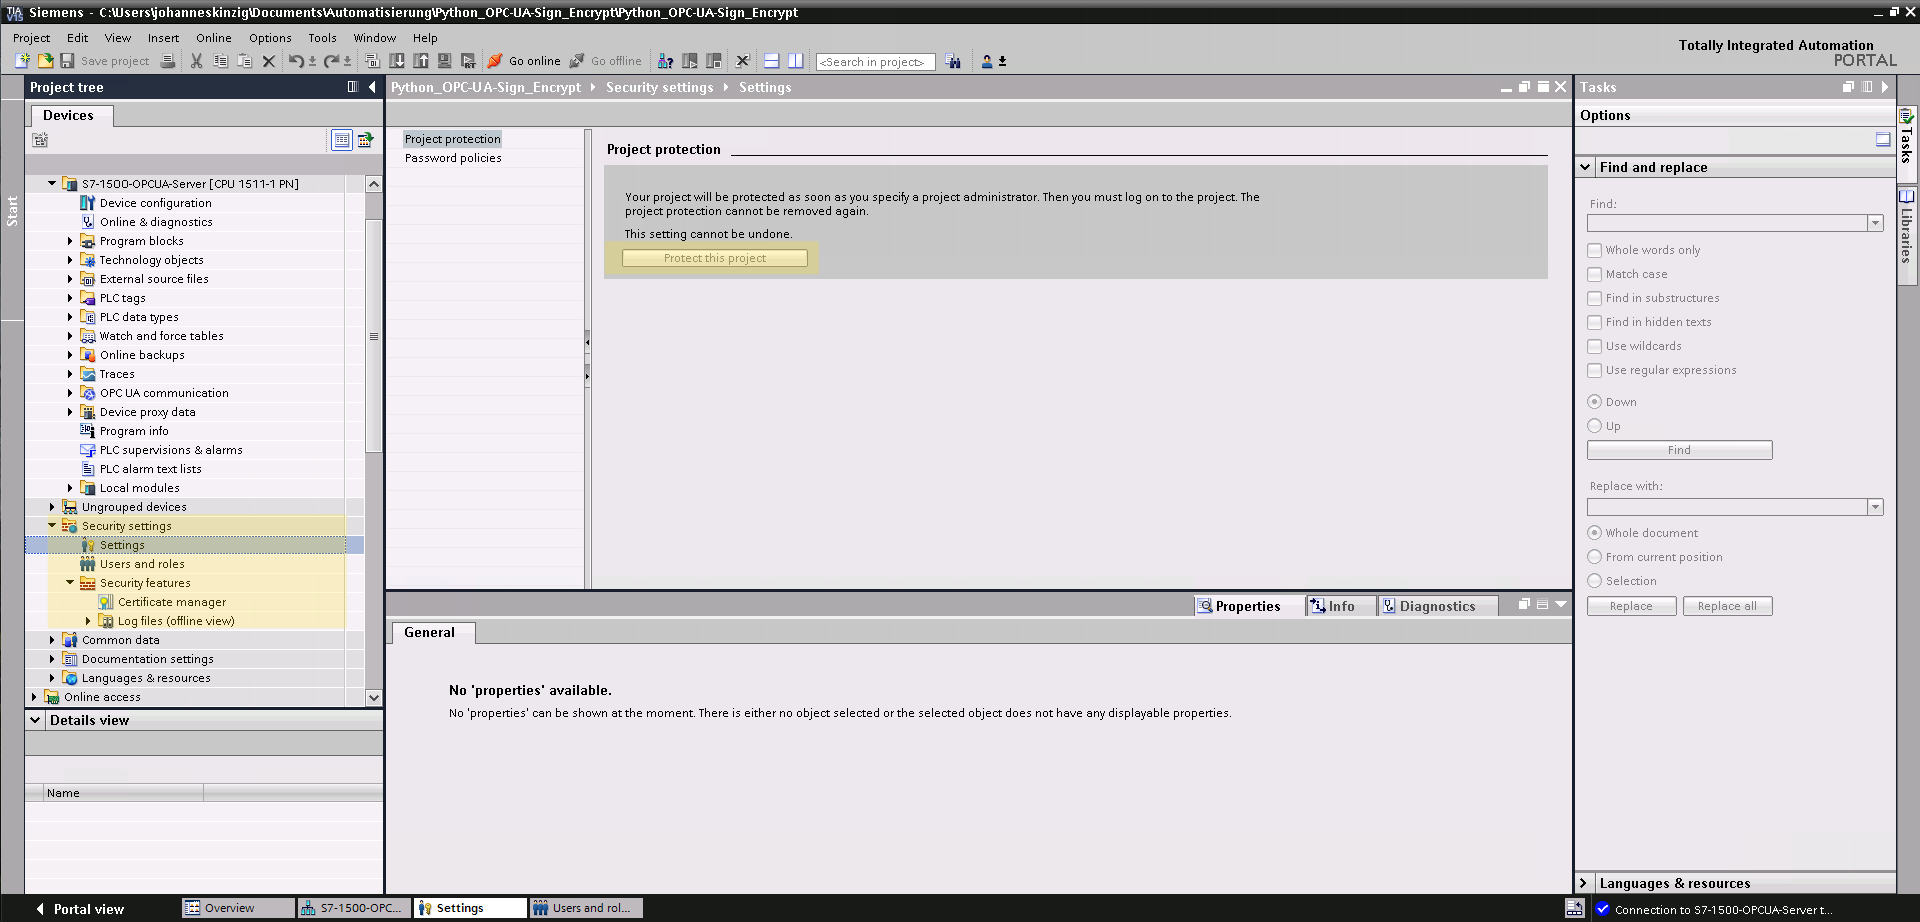
Let's get started by opening the TIA project from our previous post (Communication between Simatic S7-1500 and Python using OPC UA (unencrypted), I offer both TIA projects as two individual projects as download at the end of this post). We first need to protect our project by setting up the project protection which enables user management and authentication. You will find this setting in the project tree under Security Setting >> Settings >> Protect this project. Enable this setting and chose a username and password; while the username and password can be changed, "unprotecting" the project is not possible (once this setting is enable you have to keep it for this project). Protecting the project is necessary, to activate the global certificate manager, which we will use later, to manage and export our generated certificates and keys.
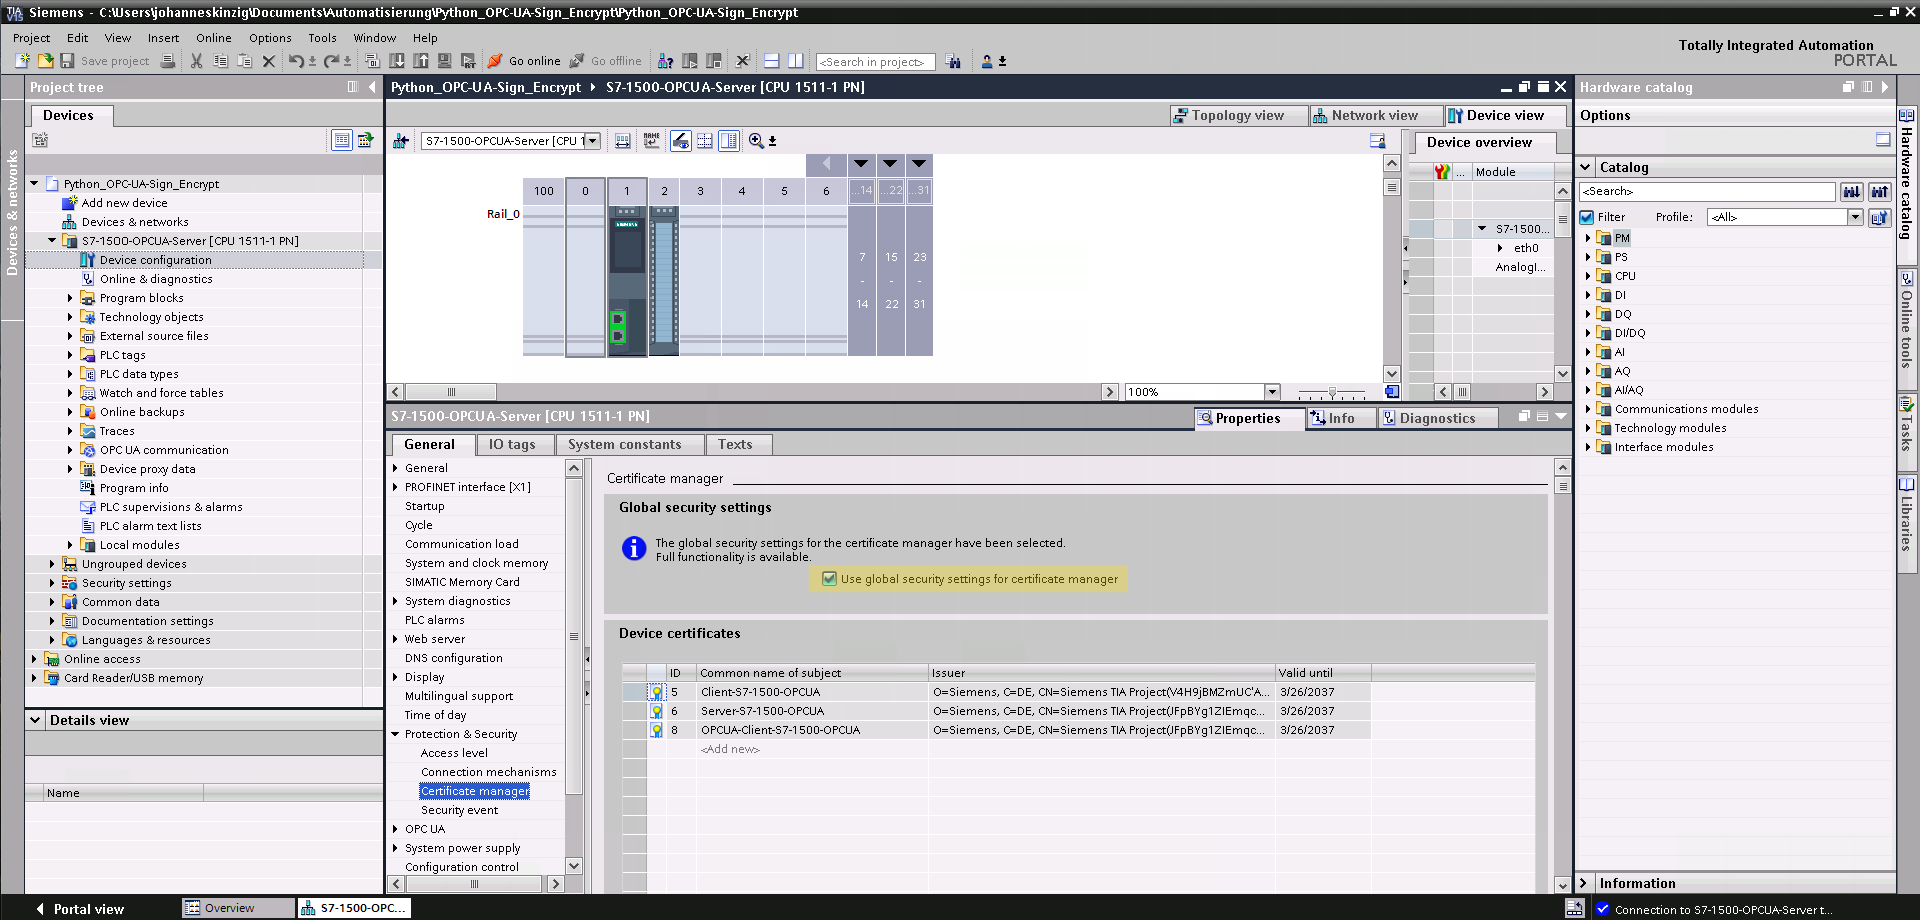
The next step is to use the global security settings for the certificate manager, this functionality can be activated in the PLC specific settings under General >> Protection & Security >> Certificate Manager >> Checkbox: use the global security settings for the certificate manager. This allows to globally manage the certificates (project wide) and not solely for the current selected CPU. For our small project, this becomes important because we will export certificates and keys for the python client, later on. In this view you can already see the generated device certificates, you will now see the same certificates when you click on Certificate manager in the project tree (once the global certificate manager is visible, chose the tab Device Certificates to see your generated certificates).
Now we continue by generating two new certificates (basically a key pair consisting of a private key and a certificate), one for the server (S7-1500) and one for the client (Python application). In the PLC specific settings navigate to General >> Protection & Security >> Certificate Manager and generate a new certificate. Basically the section is just named Device Certificates, which is misleading. Of course, you will create a complete key-pair consisting of a private key and a certificate, the public key (You cannot create a certificate as standalone, a certificate always requires a private key).
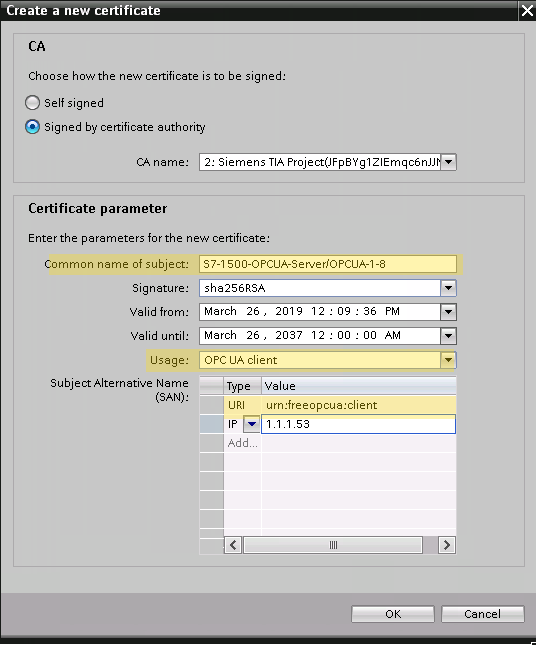
Starting with the key-pair for the server, the S7-1500: a dialog appears which asks for several parameters, for the CN (common name of subject) put something to identify the certificate as the server-certificate, I named it S7-1500-OPCUA-Server. Leave the other parameters as suggested by TIA (the picture above becomes important when creating the client certificate), check the SAN and be sure that the IP address is correct. Confirm your settings by clicking "OK" and you will end up with a server certificate (and private key). Now, navigate to General >> OPC UA >> Server >> Security >> Secure Channel in the PLC settings. Under Server Certificate, select the previously generated certificate. Now we are done with the server certificate.
 Again, we head back to the PLC specific settings (General >> Protection & Security >> Certificate Manager) to generate a key-pair for the client. Follow the same procedure as described above, once you see the dialog asking for the certificate parameters again, be careful now and refer to the picture above: For the CN (common name) put something which identifies the certificate as the client-certificate, I chose OPCUA-Client-S7-1500-OPCUA. In the field Usage, select OPC UA client, otherwise the opc ua library for our python application will reject the certificate and the communication with the server (which is indeed important, because it is always advisable to define a specific field of use for a certificate to avoid malicious usage). Next, concentrate on the SAN (subject alternative name), add a field and select URI (universal/uniform resource identifier) and put in: urn:freeopcua:client . Now we are done with the client certificate. Before we continue to work on the client side, we disable unencrypted communication by rejecting plaintext messages on the server side. In the PLC specific settings head to General >> OPC UA >> Server >> Security >> Secure Channel and disable No Security under Security policies available on the server.
The next step is to export the client certificate and key to use it in our python application. Therefore, we proceed as follows:
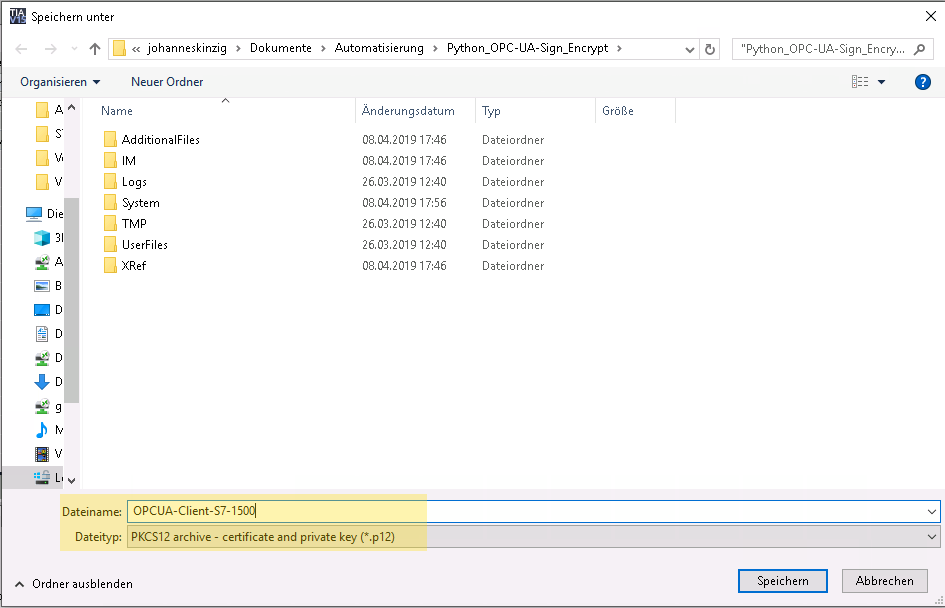
- Export client certificate and key in a PKCS12 container
- Use OpenSSL to convert the PKCS12 container to .der (certificate) and .pem (private key) to use in our python application (I am developing the TIA part on windows and the python part on Unix, this is why I come up with OpenSSL now. Nevertheless, OpenSSL is also available for windows).
- Use the certificates in the python app.
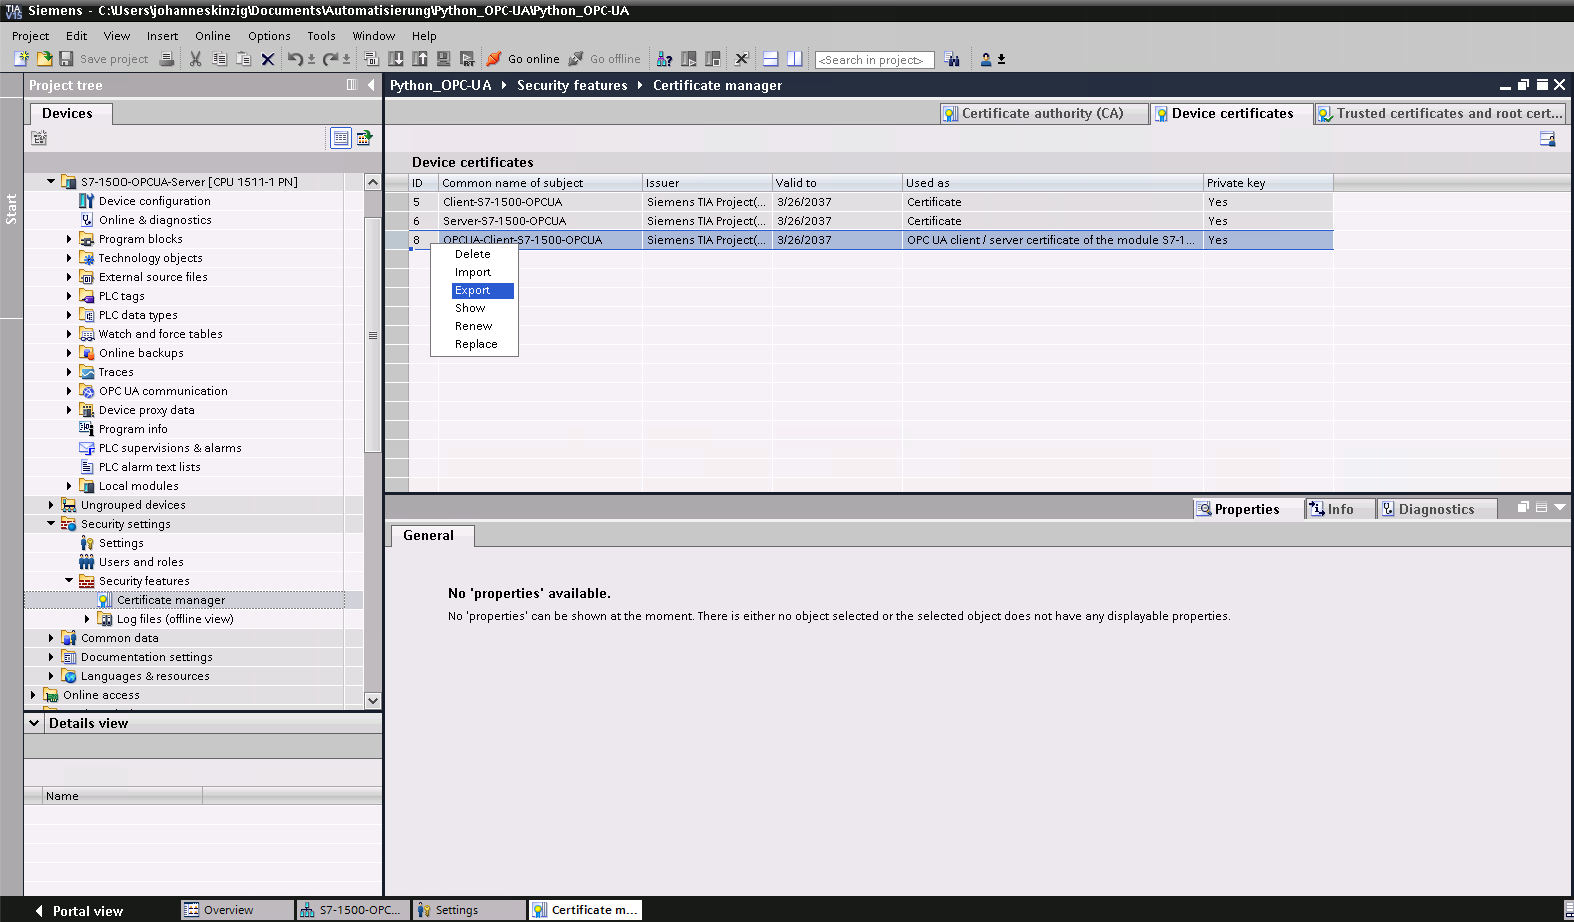
Navigate to the project wide Certificate manager and select the tab Device certificates. Chose the client certificate and click on Export. The PKCS12 container contains the private key and the certificate, therefore you will be asked for a password to protect the complete archive. Transmit the container to your Unix/Linux machine (or make sure you have OpenSSL ready on Windows) and continue with the conversion. You will need the password you were prompted for when exporting the key-pair. The following OpenSSL commands (1, 2) will extract the private key and the certificate (public key) from the PKCS12 container and will convert them into the appropriate format requested by the python OPC UA library.
# --> 1. Export keyfile and certificate from pkcs12 container to pem
openssl pkcs12 -in OPCUA-Client-S7-1500.p12 -out OPCUA-Client-S7-1500_cert.pem -clcerts -nokeys
openssl pkcs12 -in OPCUA-Client-S7-1500.p12 -out OPCUA-Client-S7-1500_key.pem -nocerts -nodes
# --> 2. Convert certificate from pem to der
openssl x509 -outform der -in OPCUA-Client-S7-1500_cert.pem -out OPCUA-Client-S7-1500_cert.der
# --> 3. Verify URI in certificate -- view certificate
openssl x509 -in OPCUA-Client-S7-1500_cert.der -inform der -text -noout
# --> 4. Verify URI in certificate -- view URI only
openssl x509 -in OPCUA-Client-S7-1500_cert.der -inform der -text -noout | grep URI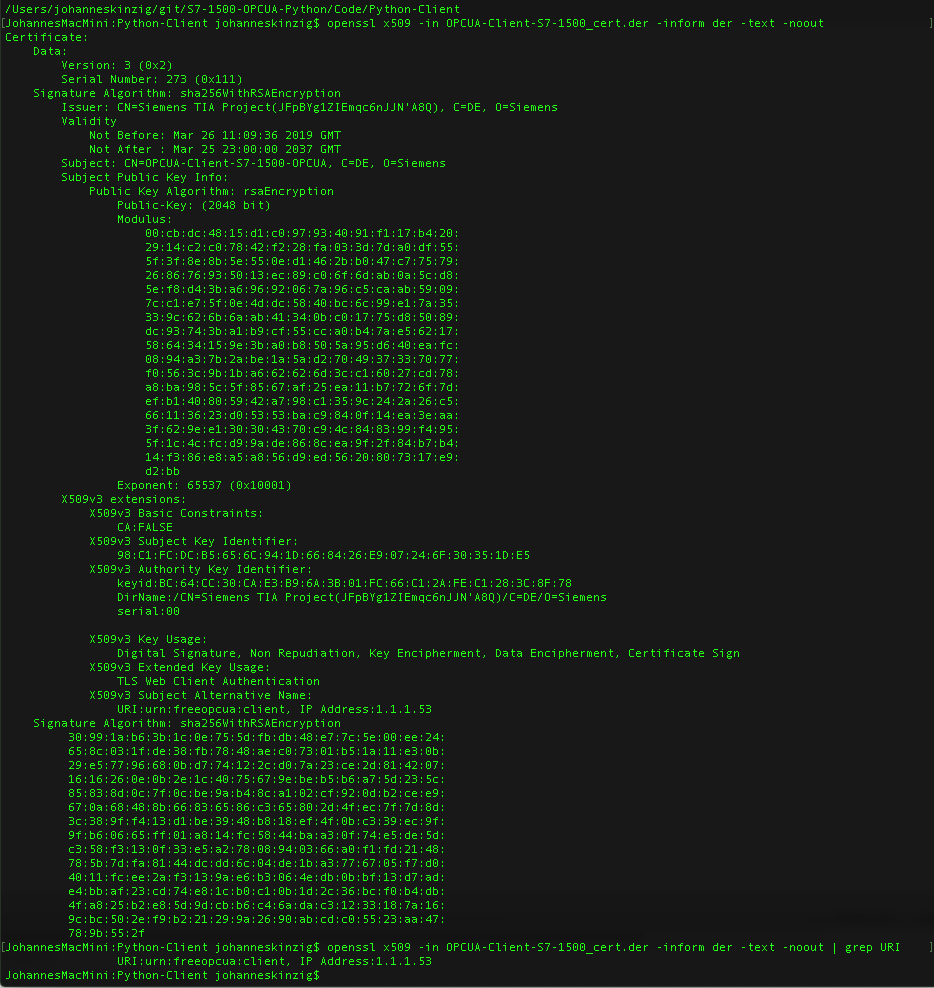 Command 3 and 4 will show the URI which we have set previously. It is important to double check the URI, because the URI in the application has to match the URI in the certificate. The client source code will now be extended by two lines of code to setup secure communication. The first line just prints the application URI to stdout which we have configured in the client certificate earlier. (Just a note: Instead of setting the URI to the fixed string while certificate setup, we also could have made up our own URI and set it in the certificate and in the python client application using
 client.application_uri = "urn:myservice.org:FreeOpcUa:python-opcua" before calling client.set_security_string(...))
The second line will be used to setup the secure channel, setting the hash for the message signatures and activating encrypted communication. Argument three and four provide the client certificate and the client private key.
print(client.application_uri)
client.set_security_string("Basic256Sha256,SignAndEncrypt,OPCUA-Client-S7-1500_cert.pem,OPCUA-Client-S7-1500_key.pem")
The whole client script now looks like this, quite similar to the script in my previous post.
import sys
sys.path.insert(0, "..")
from timeit import default_timer as timer
from opcua import Client
if __name__ == "__main__":
client = Client("opc.tcp://user:This email address is being protected from spambots. You need JavaScript enabled to view it. :4840/") #connect using a user
print(client.application_uri) # <-- either use output as URN when creating your certificate or
# set own URN for your application by using
#client.application_uri = "urn:device:type" # whatever you have as URN in your certificate
client.set_security_string("Basic256Sha256,SignAndEncrypt,OPCUA-Client-S7-1500_cert.pem,OPCUA-Client-S7-1500_key.pem")
try:
client.connect()
start = timer()
# get a specific node knowing its node id
temp1c_node = client.get_node('ns=3;s="storageTemperatures"."Temperature1C"')
temp2c_node = client.get_node('ns=3;s="storageTemperatures"."Temperature2C"')
end = timer()
#print(var.get_data_value()) # get value of node as a DataValue object
temp1c = float(temp1c_node.get_value())
temp2c = float(temp2c_node.get_value())
print("Temp1: " + str(temp1c))
print("Temp2: " + str(temp2c))
print("RTT: " + str(end - start))
finally:
client.disconnect()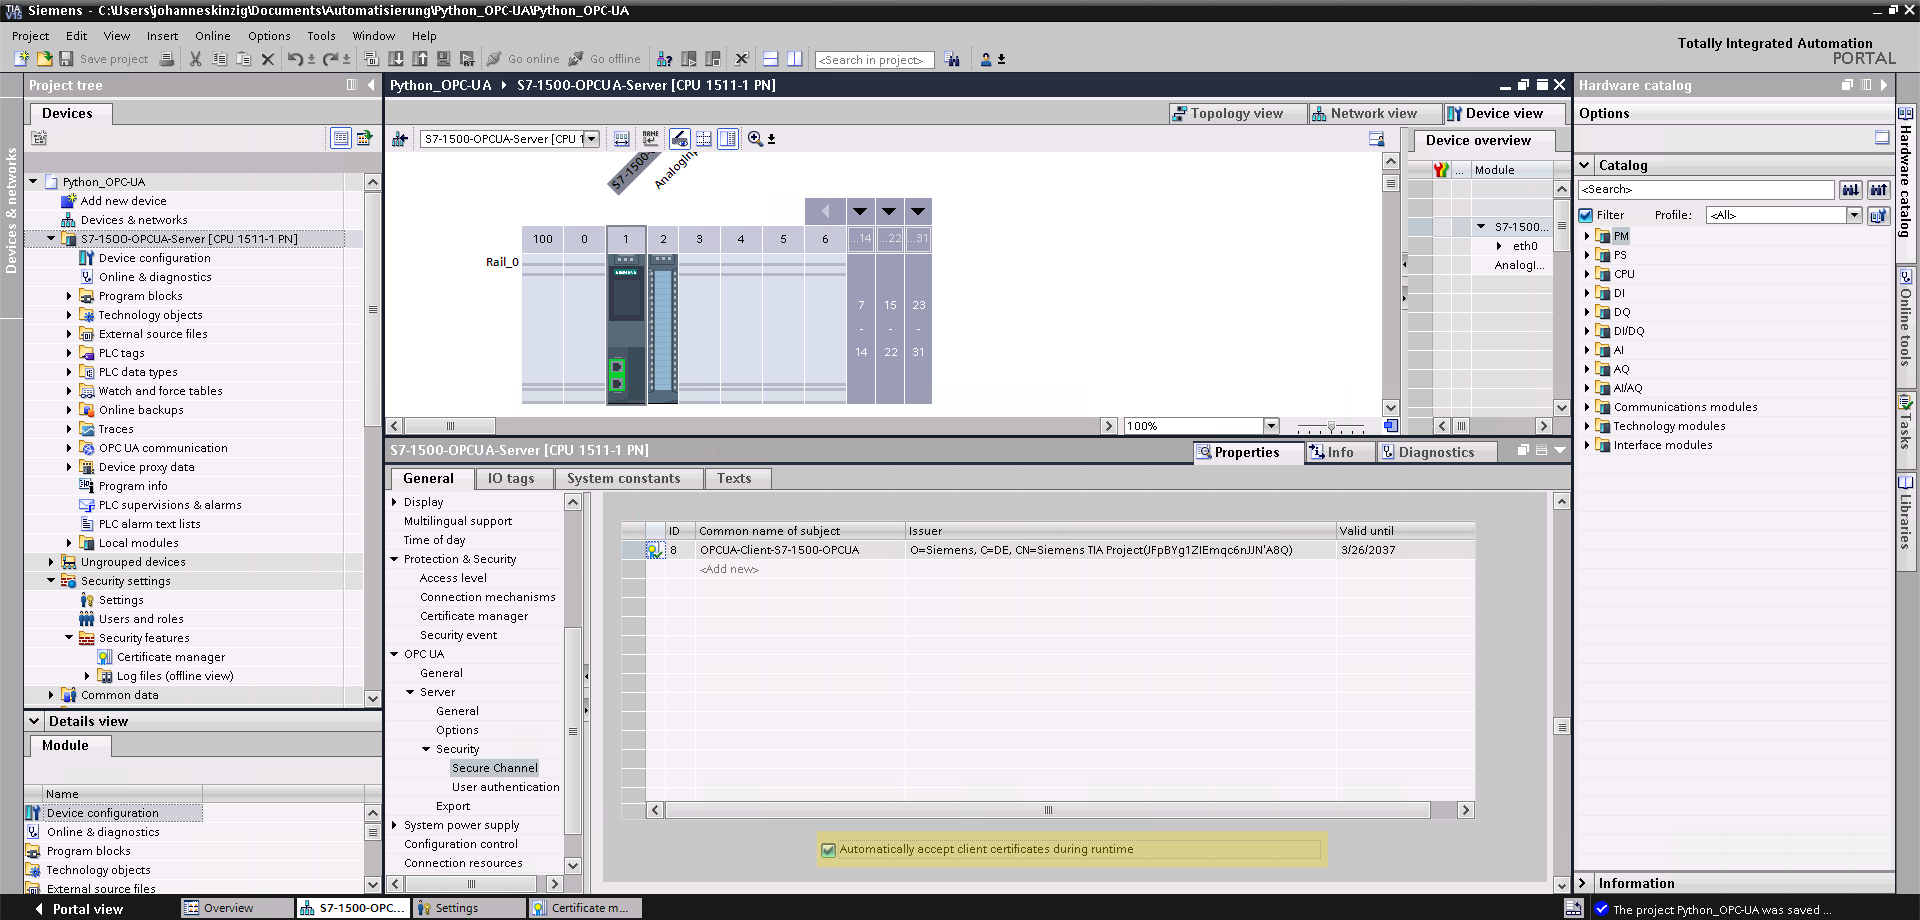 If you want to harden your setup further, you can force the server (S7-1500) to reject all unknown clients. This means you have to store all client certificates for your trusted clients in the S7-1500 and forbid the server to allow connections from clients authenticating with an unknown certificate (not listed under Trusted Clients). I have not set this up in this example, but you could easily implement this feature by disabling Automatically accept client certificates during runtime in the PLC settings under General >> OPC UA >> Server >> Security >> Secure Channel.
In the archive below I have put all client scripts and server project files, including the unencrypted versions described in the previous blog post. The TIA portal project is password protected, use admin as the username and S7!12345jk as password.
This article can be found in german language on my company's blog: siincos.com - Industrie 4.0 & IoT
